
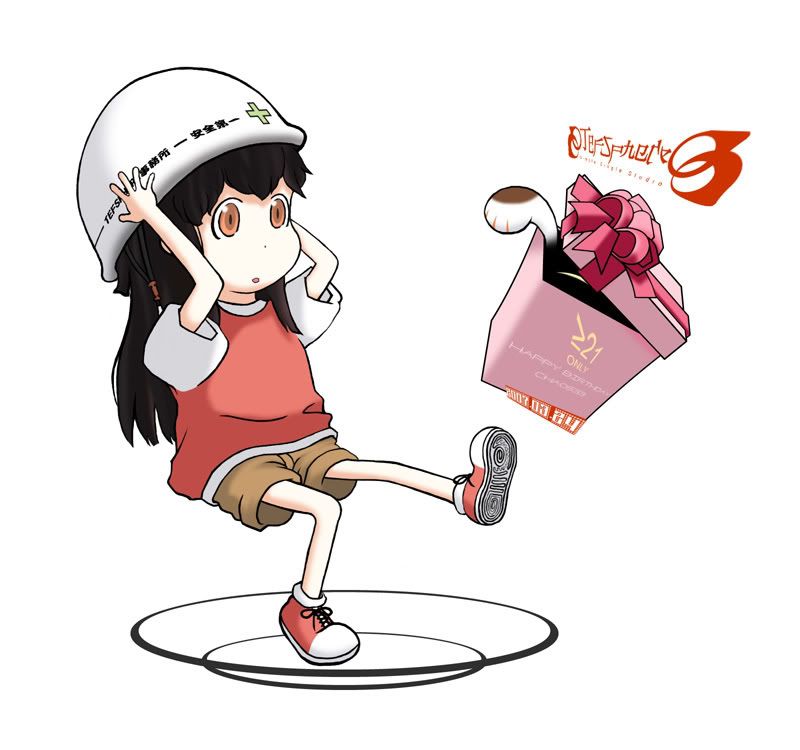
| 本来想画无边的...功力不够放弃了 那么想随随便便画一下就好了,结果却较起真来... |
| At first I tried to draw it without line but failed for my limited abilitiy... Then I just hoped it being done lazily, yet finished in earnest. |
 |
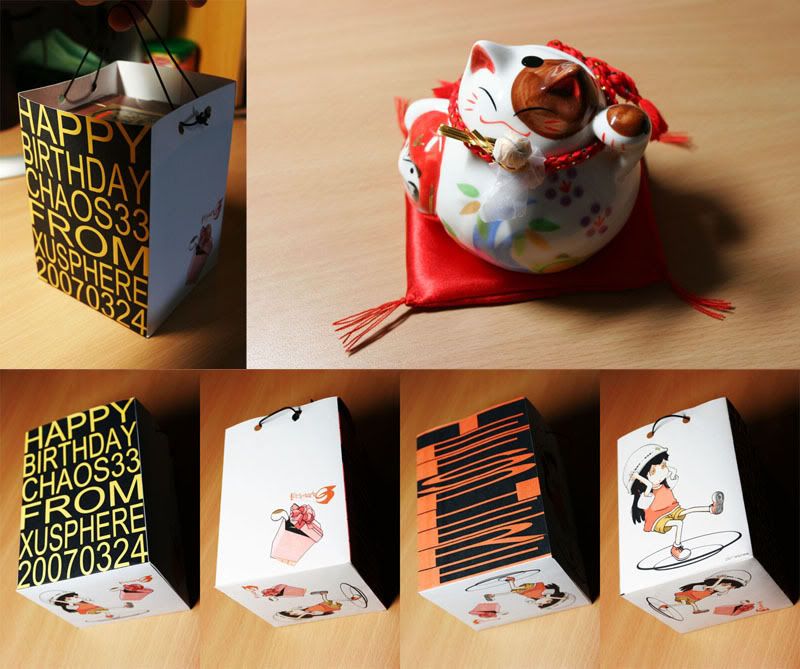
| 然后按约定做了纸袋。顺带提一下里面的礼物是这个,达摩猫?逛商场时偶尔发现的 郁闷的是已经过期了东西还没送出去...受主在纸袋快完成之时跑出去玩了 |
| Afterwards I made the paper-bag to go through my promise. By the way the present is a DAMO cat(?) which I bought in a mall once in a while. But the something gloomy is that the receiver was fooling around somewhere when the paper-bag was almost done . Consquently though it already be overdue the present is still on my desk. |
 |
| 手工纸袋制作经验之谈 MY EXPERIENCE OF DIY PAPER-BAG |
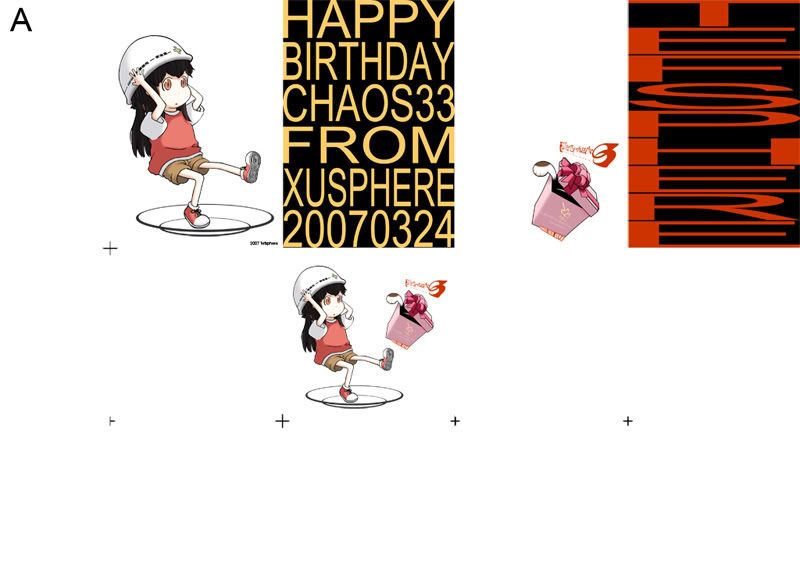
| 图A是这次纸袋原文件的缩小版,对自己的手工有自信的人只要了解一下排版就应该知道下一步该怎么做了。以下的部分说明由于个人某些方面的坚持可能会显得冗余,还请各位看官自行选择阅读。 关于颜色设置和分辨率的问题并不属于本次经验之谈的范畴,不过可以顺便提一下我使用的是300dpi的A3幅面(42cm×29.7cm),约4961×3508像素。 |
| Picture A is the shrunken sample of the original file. The one who has confidence in his handwork skill will get the next step just seeing the typesetting. As my personal insistence, some parts of the following instructions may be redundant, please choose any steps you like to follow. Setting of color management and the resolution is not associated to the topic, yet I would like to tell you that my original file is size A3 (42cm×29.7cm) with 300dpi, about 4961×3508 pixels. |
 |
| 排版 TYPESETTING |
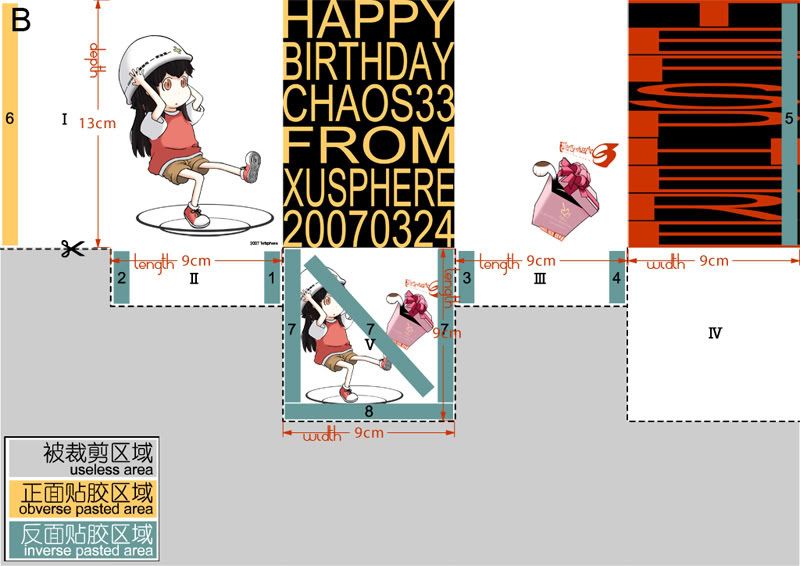
| 在制作纸袋之前请先确定好纸袋的长、宽、高,分别对应图B中的length width depth,比方我这次的纸袋是用来装一个8.8cm×8.8cm×10cm的物体,那么纸袋的设计为9cm×9cm×13cm。 我们可以把纸袋的各个面区分为构成纸袋外观的主要面,和辅助支撑纸袋的粘合面。为了保证输出的准确最好在排版前先做好各面边长的设置。我一般都单独制作好各个主要面后再把它们拖到一起进行整体的排版。排版时各个面之间要留出少量折痕的间隙,同时请做好裁剪和折纸用的标记,但注意不要影响纸袋的外观(可参考图A)。 |
| Before making the paper-bag, please make sure the length, width, depth of the paper-bag. For example, I will set my paper-bag size with 9cm×9cm×13cm if an object is put inside with size 8.8cm×8.8cm×10cm. Paper-bag can be divided into main-surfaces that form the appearance and pasted-surfaces that sustains the paper-bag. For the accuracy of the output you'd better adjust each length of the sides of all the surfaces before typesetting. I usually make each main-surface done before dragging them together to make a unitary typesetting. Space the surfaces for folds during typesetting, and take some marks to assist the paper-cutting and paper-folding without leaving effect on the appearance at the same time. |
| 打印 PRINTOUT |
| 打印预览中最好设置100%缩放以保证输出的准确,另外在主要面无损失的前提下作少许裁剪是的。一般的DIY用户我推荐120克左右的打印纸作为打印介质,过厚或者多层的打印纸会不利于纸袋的折叠。至于打印方式及打印机设置亦不在本次经验之谈的话题之内。 |
| Set 100% scale in Print of preview to make sure the accuracy of output,and it's acceptable that some area is cut out in the precondition of loss less main-surfaces. Normally I recommend users to use 120 gram print paper as the print medium because too thick or multi-layer paper are a barrier to paper-folding. Selection and setting of printer are also not included in this topic. |
| 裁剪 CUT OUT |
| 沿图B中的虚线把多余的部分剪掉,为了保证待会粘贴的顺利可以注意两个地方:Ⅳ面最好裁得比Ⅴ面小一点;Ⅱ、Ⅲ两面除了比Ⅴ面的一半小以外,长度也最好比设计的稍短。 裁剪成型后就可以打孔了(袋绳用) |
| Cut out the spare area along the broken line in Picture B. For the kilter of paste you had better pay attention to two things: First, Surface Ⅳ should be cut smaller than Surface Ⅴ; Second, besides,? the area should be smaller than the half of Surface Ⅴ, the length of Surface Ⅱ and Surface Ⅲ should also be a little bit shorter than your setting. |
 |
| 粘贴 PASTE |
| 这是比较容易出问题的环节。由于手头材料的问题我使用了相对较薄的80克纸来制作,如果使用一般的胶水或浆糊来粘贴的话容易使外观打折扣。在这种考虑下我使用了双面胶来作为粘贴介质。图B中已标出了双面胶的粘贴位置及粘贴顺序,纸袋底部构成由上往下依次为:Ⅳ - Ⅱ、Ⅲ - Ⅴ。比方说,我们先不要急着去揭开其他的双面胶,把Ⅱ面的1对齐贴好,然后再用裁纸刀或指甲小心地把2的双面胶揭开,贴好2,以此类推。粘贴时袋内放一个基本等大的物体会方便很多。 |
| Attention, please, this is the most fallible course. As the lack of material, I have to use the thinner 80 gram print paper to make my paper-bag. However gluewater and common paste may can not keep the appearance perfect. In such case double-faced tape is the good choice. In Picture B the position and the order of dft are mentioned. The bottom of paper-bag is basipetally formed by Ⅳ - Ⅱ/Ⅲ - Ⅴ. ex. Paste Position 1 well without uncovering other dft, then uncover the DRF in position 2 by a paper knife or finger tip,afterward paste Position 2 well, and so on. It will be much more convenient if you put an appropriate object inside when you make the paper-bag. |
| 完成 ACCOMPLISHMENT |
| 粘贴好后纸袋便成形了。袋绳的话可以从其他纸袋拆出来穿。有心的话还可以在边缘贴透明胶布起加固作用。 |
| The paper-bag will be shaped after finishing the paste. Ropes of the paper-bag can be dismantled from the other paper-bags. People can paste transparent rubberized fabric along the edges to reinforce the bag if necessary. |
No comments:
Post a Comment